Time to Start the Seeds

Soil block with seed in it.

It’s that time of year again…time to start thinking about what you want to plant outside in a few weeks. This is extremely important when you are starting your own plants from seeds. When starting plants from seeds you always need to be thinking a few weeks in advance.

This year I decided to move my seed starting date out several weeks. Over the last few years I normally started my broccoli, cabbage, cauliflower, lettuce, spinach, cilantro, and dill the first week of February, with a transplant date of the first week or two of March. Continue reading

Starting Seeds with Soil Blocks

It’s that time of year again to start thinking about starting your seeds indoors. It’s a great way to get a jump on spring. For the last few years I have been using soil blocks to start my seedlings. They are a great alternative to those plastic seed starting cells. There is a small initial investment in purchasing the soil block molds, but once that’s complete your done. Unlike the plastic cells you need to buy every few years.

If you are considering using soil blocks to start your seeds, there are a few things you’ll need:

  1. Soil block makers: I suggest purchasing a 3/4″, 1-1/2″, and 2″ block molds
  2. Seed starting soil: see the recipe below
  3. Trays: Any seed starting tray will do. I prefer to use photo developing trays, they are thicker and have channels on the bottom. I also use old cake pans, for smaller blocks.
  4. Hardware cloth (wire mesh): 1/4″ or 1/2″ grid, cut to fit in the bottom of the tray.

Soil Block Makers

Soil blocks are created by molding soil into a particular size cube. There are several size soil block molds available on the market today. I own a 3/4″, 1-1/2″, and 2″ mold. The 2″ mold has inserts that can be installed to create an opening in the block to receive a 3/4″ block. This allows you to block up as the plants begin to grow. The block size is often determined by the seed size, I use a 3/4″ block for lettuce, flowers, broccoli, and tomatoes (just to name a few), but a 1-1/2″ block for squash seeds. The 2″ blocks are great for blocking up from a 3/4″ block.

Continue reading

A Simple Seed Starting Stand

Wire shelf seed starting stand.

Depending on your location and planting schedule, it may soon be time to start thinking about starting those seeds indoors. If you are considering trying this for the first time, here is a simple stand that you can build quickly to get things started.

Continue reading

Transplanting Heirloom Tomatoes

Once my heirloom tomato plants start to grow their second set of true leaves, I transplant them from the small seed starting cells to larger pots.

Tomato Transplant

The transplant mixture that I use in the new pots is a combination of my standard seed starting mix and perlite. I usually mix about 4 parts seed starting mix to 1 part perlite. After the mixture is combined I wet it with water before placing it in the pots.

Transplant Mix

I place a little transplant mixture in the bottom of each pot. Note: make sure that whatever pot you use, there is a drainage hole in the bottom. I usually use a pot that is between 3 inches and 4 inches in diameter at the top. I have used a wide variety of pots over the years, from yogurt cups to standard green plastic pots. Recently I have been using a natural, biodegradable, and OMRI listed pot, they work really well.

Tray of transplant pots.

Once I remove the transplant from the seed starting cell I cut off the bottom leaves from the transplant. When I place the transplant in the new pot I make sure to bury the stem deeper then it previously was, to help encourage the development of a stronger root system. I only let the top leaves and a little of the stem stick above the mixture in the pot.

Tomato transplant with lower leaves removed.

Note: make sure to move the plant labels with the transplant so you don’t forget what was planted in the pot. I place the completed transplants back into the seed starting tray and place them under the grow lights. In a few weeks they should be ready to harden off outside.

Tray of completed tomato transplants.

Happy Growing…

Seedling Update

It’s been two weeks since I started my seeds and all but a few seem to have germinated really well. The only seeds that have not germinated yet are one of the varieties of bell pepper (maybe old seeds) and the Greek oregano (which seems to be really slow to germinate).

Tray of seedlingsI have been keeping the seedlings under lights for about 14 hours a day. I usually water the seedlings in the early morning and the late afternoon. Several days ago in order to keep the seed starting mix damp all day, I had to switch from just misting the seedlings to watering and misting the seedlings.

Seedlings in seed starting tray. In a few days I will thin out some of the seedlings, keeping the plants that seem to be the strongest. I will also have to transplant my tomatoes soon to small pots. I will post more on my tomato transplant process.

Happy growing..

Seed Starting Time

I began growing my own plants from seeds several years ago when I became frustrated with the selection of plants that were available at the greenhouses. Over the years I have had good success with starting a wide variety of herbs and vegetables. The following is the process that I use.

Seed Starting Supplies:
– Seed starting tray with cover and tray cells (if cared for, these can be reused for several years)
– Organic seed starting mix
– Standard fluorescent shop lights with some way to adjust the height above the seed starting trays.
– Last but not least the seeds, the following is the list of the seeds that I started this year.

The Seeds for 2012: 
– Heirloom Tomatoes: Red Zebra, Cherokee Purple, Hillbilly, Gold Medal, Mortgage Lifter, Amish Paste, Large Cherry, and Cherry Roma
-Peppers: Bull Nose and Fish
-Herbs: Dill, Cilantro, Summer Savory, Genovese Basil, Sweet Basil, Large Leaf Italian Basil, English Thyme, and Greek Oregano.

Seed Starting Supplies

Seed starting supplies

The first step in my process is to fill a tub with seed starting mix (the approximate amount I need to fill the cells) then I add water to the mix until the mix is really saturated.

Seed starting mix in a tub

Seed starting mix

The next step in the process is to fill all of the tray cells with the seed starting mix. I fill each cell about 3/4 full with the mix. Then I make plant markers to label what plant is growing in each cell. I put the plant markers in first so that I don’t forget what seeds were planted in each cell when I am all done.
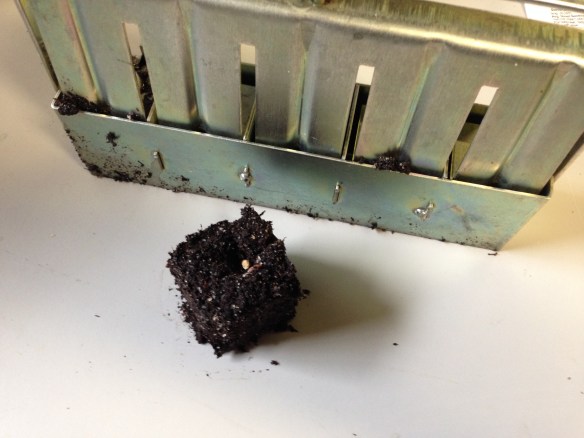
Once all of the plant markers are in place, I begin placing a few seeds of the variety in each cell to ensure germination in each cell. After the seeds sprout, I will go through and thin out the seedlings in each cell. After all the seeds have been placed in the appropriate cells, I take some dry seed starting mix and cover up all the seeds so the seeds are the correct depth. Then I take a spray bottle filled with water and mist the top of all the cells.

Seed tray filled with seeds and mix

Seed starting tray filled and ready to go

The last step in the process is to cover the tray with the clear plastic lid and place it under the lights. I use a standard 4 bulb fluorescent shop light, with standard bulbs. I have used this light system for the last 5 years with great results. My light hangs from a simple stand that gives me the ability to adjust the height of the lights as the plants grow. I usually keep the light only a few inches above the seed trays to start.

Seed starting tray under lights

The seed tray under the lights

I leave the clear plastic cover on until the first seeds start to germinate and push through the mix. Not all the seeds will germinate at the same time, so I make sure the cover is removed once the first seedlings push through. Once the cover is removed it is important to make sure that the seedlings are kept moist. I use a spray bottle filled with water to mist the seedlings.

I will keep you posted on the progress of my plants.

Happy Growing…